
UK Dutyholders: Pre Flush vs Post Flush Sampling Under BS 7592

Pre-flush (first-draw) samples show what a user is exposed to; post-flush samples show what the distribution system is delivering. As a rule, use pre-flush for cold-water sentinel points and routine occupant-exposure checks, and reserve post-flush, often with outlet disinfection, for diagnostic work such as tracing a contamination source or validating remedial works. The two are not interchangeable, and mixing them without recording the method wrecks any trend analysis you build afterwards.
TL;DR:
Pre-flush samples capture water immediately at the outlet, reflecting actual occupant exposure, while post-flush samples assess overall system contamination after flushing or disinfection.
Paired sampling helps distinguish between outlet-specific issues and systemic problems, guiding targeted remediation efforts.
Accurate sample collection requires strict adherence to protocols, including proper labeling, neutralizer use, and recording method, outlet ID, and rationale.
Results where pre-flush is positive but post-flush is negative suggest outlet fittings are contaminated, whereas both positive indicates a system-wide issue.
Follow UK standards and guidance, like BS 7592 and HSE HSG274, to ensure sampling plans are effective and defensible during audits or investigations.
Table of Contents
What each sample includes and why they are different
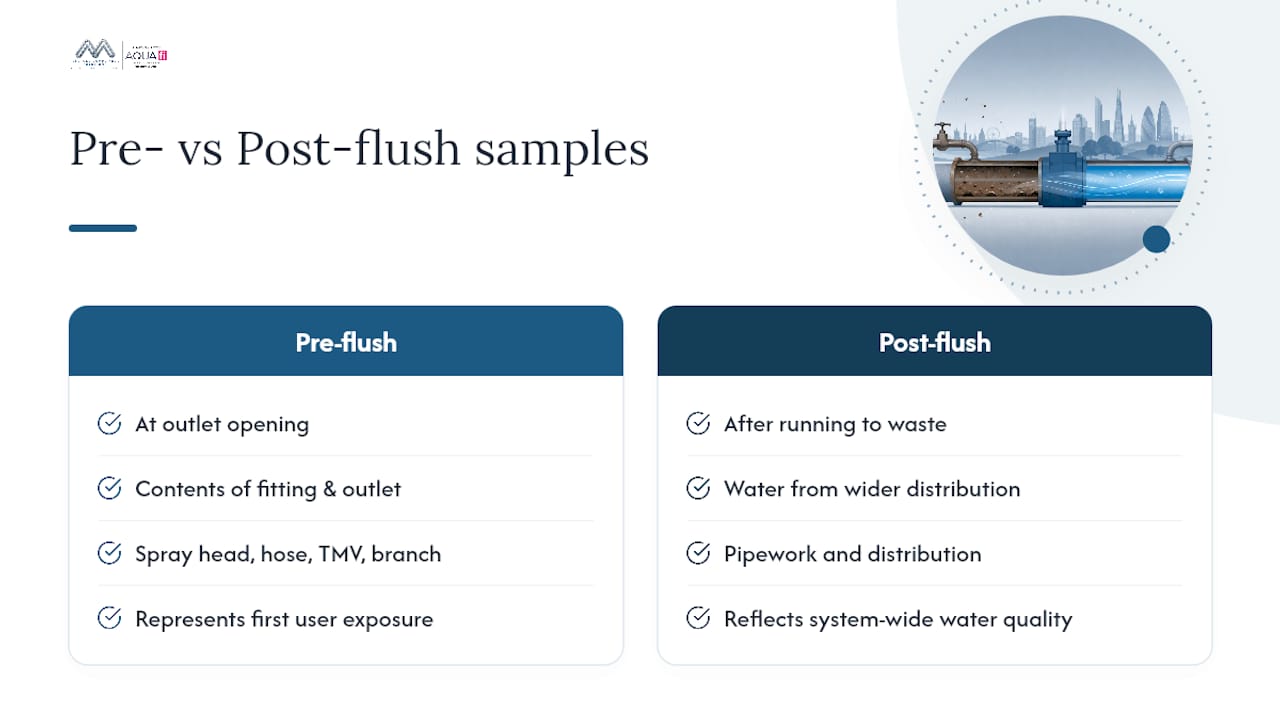
A pre-flush sample is collected the moment the outlet is opened, with no running water beforehand. It captures whatever has been sitting in the spray head, flexible hose, thermostatic mixing valve (TMV) and the last stretch of branch pipework, which is exactly what a user’s hand or mouth would meet first. That makes it the standard for assessing real-world exposure.
A post-flush sample is taken after the outlet has run to waste, sometimes with the fitting disinfected first, so the result reflects water coming through the wider distribution system rather than whatever was growing locally in the tap fitting. Pre-flush isolates the outlet; post-flush isolates the pipework behind it.
Because each sample tests a different volume of water and a different part of the system, their results are not directly comparable on a like-for-like basis. A high count on a pre-flush sample and a clean post-flush sample from the same tap are not contradictory. They are answering two different questions, and treating them as one metric is where a lot of sampling programmes go wrong.
When to choose pre-flush, post-flush or paired sampling
Decide the question before you decide the method. If you are checking what an occupant is actually exposed to, whether for routine monitoring or a sentinel point survey, pre-flush is the appropriate choice. If you are trying to work out whether a positive result comes from the outlet fitting or the system feeding it, post-flush, usually paired with a pre-flush sample from the same tap, gives you that answer.
Typical scenarios where each method applies:
Routine sentinel monitoring (cold taps nearest the tank, hot outlets furthest from the calorifier): pre-flush, following the sentinel logic set out in NIPCM guidance.
Diagnostic investigation after a positive result: paired pre-flush and post-flush from the same outlet, to localise the source.
Commissioning or return-to-service after remedial work: post-flush, often with disinfection, to confirm the system itself is clear.
Validating a repair to a single fitting (new hose, serviced TMV): pre-flush retest on that outlet, since that is where the fault was.
Paired sampling earns its cost when a single result is ambiguous. Record which outlet, which method and why on the sampling plan every time, so the rationale survives an audit months later even if you cannot recall the specific job.
Procedures: step-by-step collection for compliant samples
Before touching a tap, confirm the sampling plan states which method applies to which outlet and why. Pack sterile bottles with sodium thiosulphate neutraliser, gloves, labels, a permanent marker and the chain-of-custody form. Check bottle expiry and neutraliser fill level; an under-dosed bottle can leave residual disinfectant that suppresses laboratory counts.
Pre-flush collection:
Approach the outlet without running any water first.
Do not remove the spray head or aerator; the sample should reflect what the user actually touches.
Open the tap fully and fill the bottle to the marked line, typically around one litre for potable water testing.
Cap immediately, invert gently to mix the neutraliser, and label with outlet ID, date, time and “pre-flush”.
Post-flush collection:
Run the outlet until the water reaches a stable temperature (usually two minutes at hot outlets) or runs visibly clear at cold outlets.
Where the sampling plan calls for outlet disinfection, remove the spray nozzle, immerse it in a chlorine-based disinfectant for the manufacturer’s contact time, then flush thoroughly to clear all disinfectant residue before sampling, a technique detailed by AquaCert’s sampling guidance.
Collect the sample only once you’re confident no biocide carryover remains, since residual disinfectant will suppress the result and mask a genuine problem.
Label as “post-flush”, noting whether disinfection was applied.
Pro Tip: If an outlet was cleaned, descaled or flushed in the days before your visit, note it on the chain-of-custody form. A “clean” result three days after someone stripped and disinfected a shower head tells you almost nothing about ongoing risk.
Any deviation from the planned method, a jammed valve, a missing aerator, an outlet that would not reach temperature, needs recording at the time, not reconstructed later from memory.
Interpreting paired results and what to do next
Paired samples turn a single number into a diagnosis. The four possible combinations point to genuinely different problems, and treating them the same way wastes time and money.
Pre-flush positive, post-flush negative: contamination is localised to the outlet fitting. LegionellaCheck’s guidance notes this pattern usually resolves with a replacement spray head or hose, or a TMV service, rather than any system-wide intervention.
Both positive: the problem extends into the distribution system. This warrants a plant-room check, temperature profiling across the circuit and likely a full disinfection programme rather than a spot fix.
Pre-flush negative, post-flush positive: less common, but it can indicate contamination introduced further back in the system that has not yet colonised the outlet itself, or a flushing regime that is masking an outlet issue. Investigate before assuming the system is clean.
Both negative: no immediate action, but confirm the result sits within your routine monitoring cycle rather than treating it as a one-off pass.
Re-sample promptly wherever a positive is found, and escalate to a wider survey if a second positive confirms the first. Total Viable Count (TVC) testing and outlet temperature checks alongside Legionella culture results help distinguish a genuine biofilm problem from a temporary sampling artefact.
BS 7592, HSE and NHS guidance: the UK standards behind sampling choices
BS 7592:2022 is the reference point for how UK sampling plans should be built. Its update tightens expectations around targeted sampling and states plainly that post-flush samples taken without disinfection, particularly from showers, can be difficult to interpret because you cannot separate outlet contribution from system contribution.
HSE’s HSG274 Part 2 ties sampling directly to the dutyholder’s risk assessment and requires it to sit under competent person oversight, with results recorded and acted on, not filed away. In healthcare settings, HTM 04-01 and NIPCM guidance add sentinel-point logic specific to clinical risk. None of these documents mandate one universal method. They all push towards the same principle: pick the method that answers your actual question, and write down why.
Chain of custody, storage and transport
Every sample needs the same core fields on its label and paperwork: outlet ID, pre-flush or post-flush, exact time taken, sampler’s name, whether neutraliser was present, and a short rationale code linking back to the sampling plan.
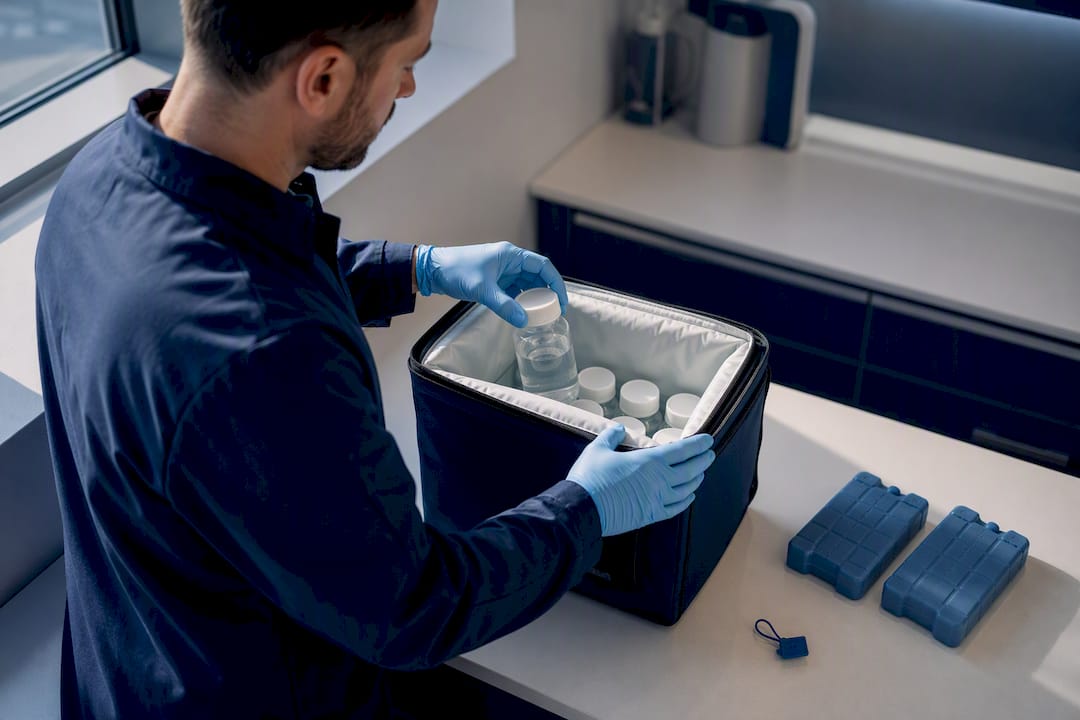
Keep samples cool, out of direct sunlight, and get them to the laboratory within the timeframe your provider specifies, generally within 24 to 48 hours for microbiological testing. If transport will be delayed, note it on the form; a late-arriving sample with an honest timestamp is far more defensible than one with a quietly adjusted date. The chain-of-custody form itself, covering collection time, courier handover and lab receipt, exists precisely to stop a disputed result turning into a disputed process.
Practical pitfalls and recordkeeping: expert tips from Bespoke Compliance Solutions
The most common failure isn’t a bad sample. It’s a mislabelled one, or an outlet quietly run before “pre-flush” collection because someone forgot the protocol. Inconsistent method across surveys at the same sentinel point does more damage to trend data than a smaller sample count ever would.
Pro Tip: Capture outlet ID, method, time, sampler and rationale code on every single sample, no exceptions. A consistent minimum dataset beats an occasional wider survey with patchy records.
How we apply this on site
When we design a sampling plan during a risk assessment, the method follows the question, not habit. Paired sampling has repeatedly shown a positive traced to a single tired shower hose rather than the system, saving clients from an unnecessary plant-room shutdown. Our technicians work to BS 7592 and HSG274 as standard practice on every site.
— Sammi
Get your sampling plan right the first time
Bespokecompliancesolutions designs sampling plans around the question you actually need answered, not a generic monthly swab that leaves you guessing whether a positive is an outlet fault or a system problem. That distinction is exactly what this article has been building towards, and getting it wrong costs far more in re-sampling and plant-room downtime than getting it right first time.
[
Our Legionella water testing and analysis service is competitively priced and covers pre-flush, post-flush and paired collection with full chain-of-custody documentation. If your current sampling plan doesn’t specify method by outlet, or you’ve had a positive result you can’t yet explain, book a Legionella risk assessment, and we’ll build a sampling rationale specific to your site rather than a generic monitoring calendar.
Standards and guidance worth keeping close
Keep BS 7592, HSG274/L8 and, where relevant, HTM 04-01 to hand, alongside practical references from LegionellaCheck and Legionella. Always check against your own site-specific risk assessment first.
This article is general information, not a substitute for advice from a qualified doctor. Consult a qualified healthcare professional about your own circumstances before acting on anything here.
Sources
FAQ
What is the British standard for sampling for Legionella?
BS 7592:2022 is the current British standard covering how to plan, carry out and document Legionella water sampling, including guidance on targeted sampling and choosing between pre-flush and post-flush methods. It sits alongside HSE’s HSG274 and L8, which set the wider legal duties around risk assessment and control.
What is the protocol for sampling for Legionella?
The protocol depends on the sampling plan’s objective: pre-flush for outlet exposure, post-flush (sometimes with disinfection) for system-level checks. Every sample needs a labelled bottle with neutraliser, an accurate time and outlet ID, and a completed chain-of-custody form before it leaves site.
How do I sample water for Legionella testing?
For pre-flush, open the outlet without running it first and fill the bottle immediately. For post-flush, run the tap to temperature or until clear, disinfect the fitting if the plan requires it, flush the disinfectant away, then fill the bottle and label it clearly.
How often should water be sampled for Legionella?
Sampling frequency depends on the risk assessment findings, system type and any recent remedial work, rather than a single fixed interval across all sites. Routine cold and hot sentinel outlets are typically checked as part of a scheduled monitoring cycle set out in the site’s own Legionella risk assessment, with more frequent or targeted sampling following any positive result.
Recommended
Comments